Essbase Studio Deployment Workaround
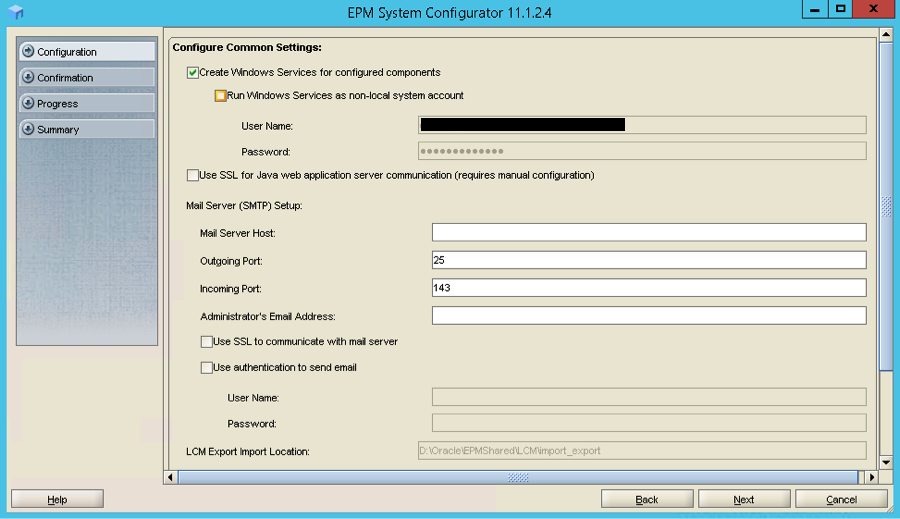
When recently trying to deploy Essbase Studio, I ran into an issue where it would not create the Windows service because the password for the Windows Services install account contained one or more unacceptable characters.Here are the steps I performed to work around this issue.Start by re-launching the Configuration tool on the Essbase server. This time be sure to choose “Configure Common Settings." Then click “Next.”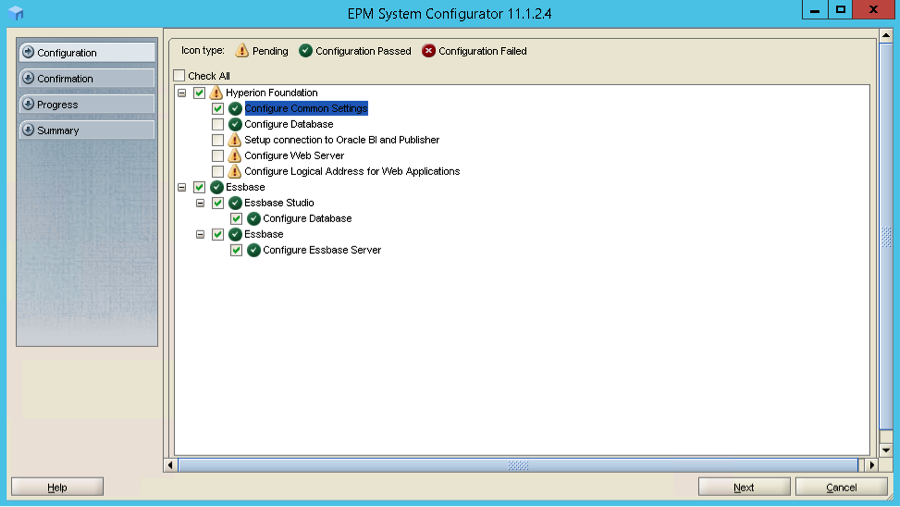 Deselect the “Run Windows Services as non-local system account” option. Then click “Next.”
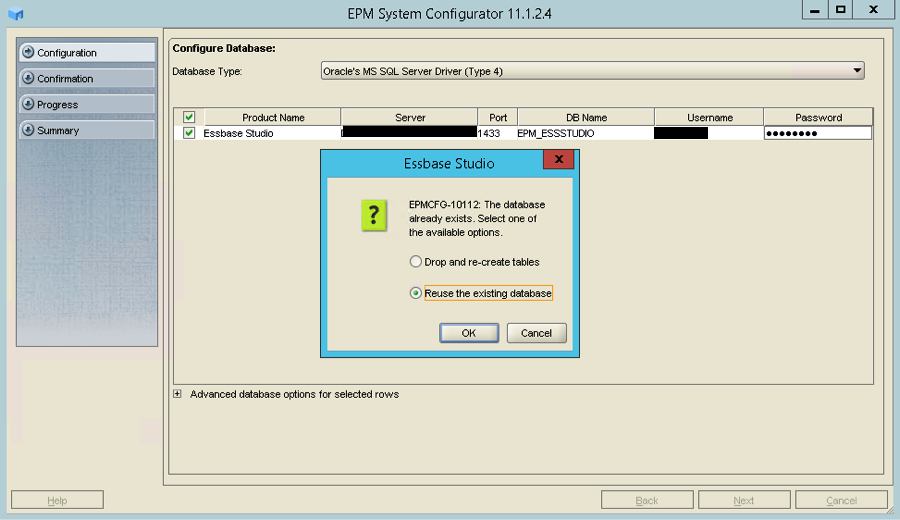
 Now follow through the rest of the process of configuring Essbase Studio. As you have already tried to configure Essbase Studio once, you will encounter the option to either “Drop and re-create Tables” or “Reuse existing database.” I would choose to “Reuse the existing database.” Click “OK” and then “Next.”
 Now continue with your configuration. When you have completed the process, if you look at your deployed services, you will find that Essbase Studio has been deployed. Please note, that it has configured to run as the "local system" account.
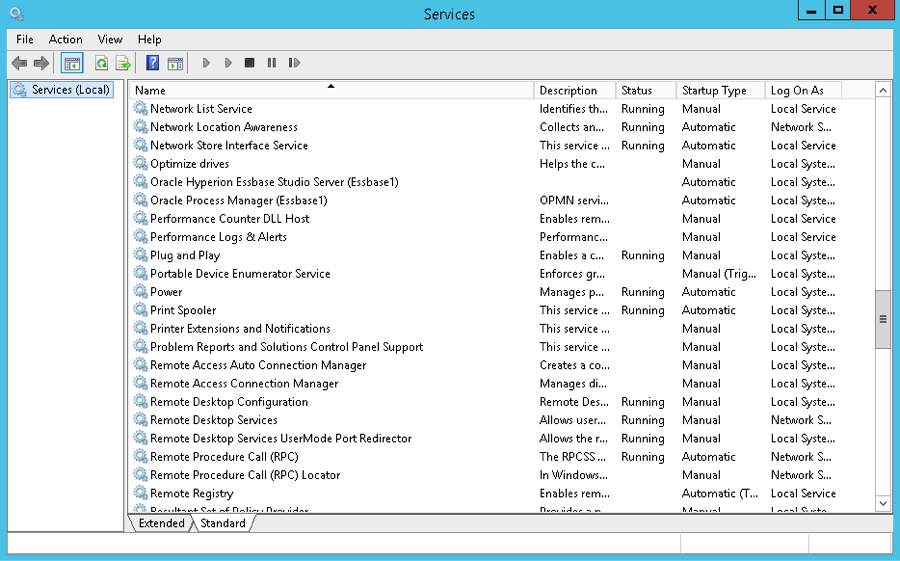 It is important to go back to you services screen now and change the Essbase Studio settings manually. So, right click on Essbase Studio and click on “Properties.”
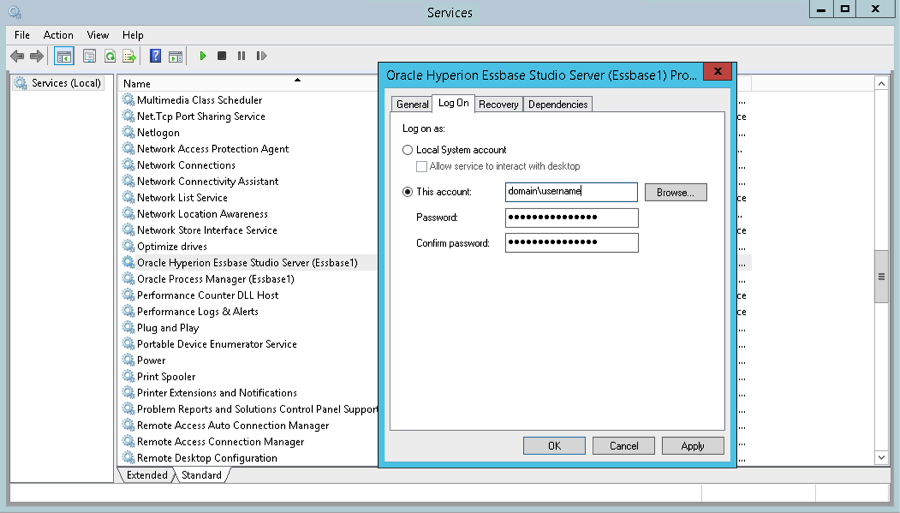
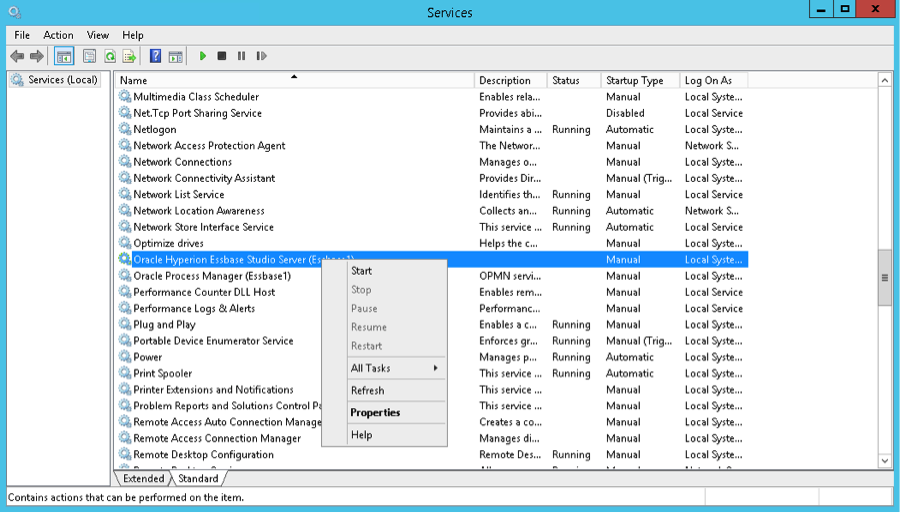 Select the “Log on” tab. Input the correct windows account information and select “Apply.” When you go back to your services screen, you will find that the Essbase Studio Service is no longer a local system service. It will now be the windows service account that you previously input.
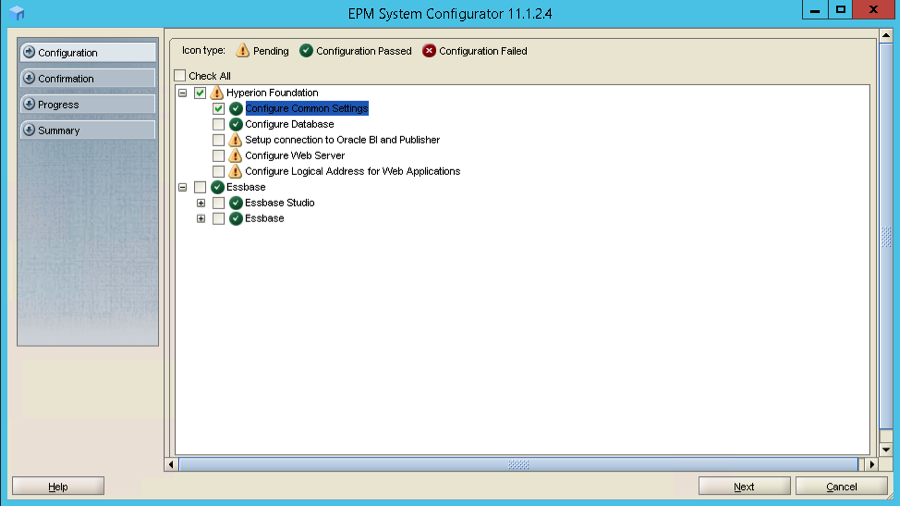
 The next step is to run the configuration tool again, this time, only select “Configure Common Settings.”
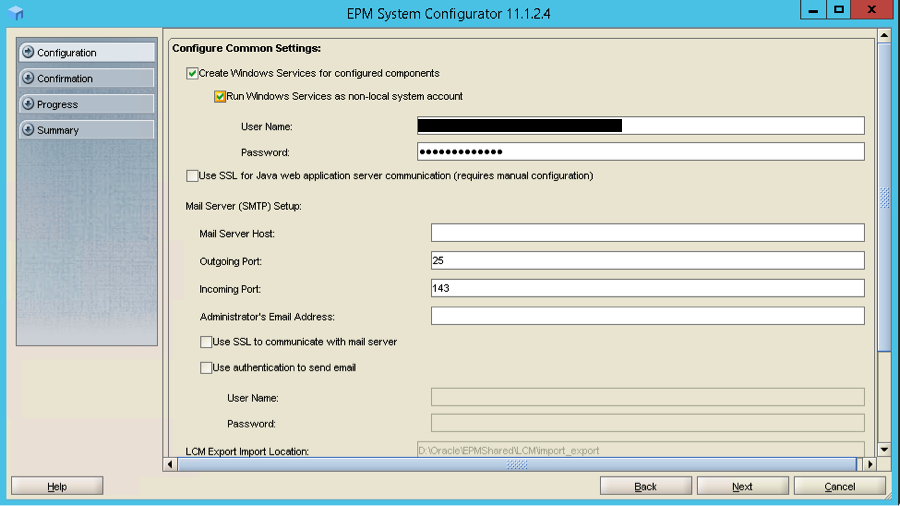
 Select to “Run Windows Services as non-local system account.” Input the right domainusername and Password. Then click “Next.”
 And now finish the rest of the steps in the configuration process.We at iArch Solutions hope you found this blog helpful. Is there a question you want answered in a blog? Send us your questions, comments and feedback.
